General
This is the documentation for the OneUp v1 API. Read the contents of this page carefully, including the authentication process and the rate & limits described below, to understand how to be a good API citizen and to understand general restrictions and concerns.
Your use and access to the API is expressly conditioned on your compliance with the policies, restrictions and other provisions related to the API set forth in our API Restrictions and Responsibilities and the other documentation we provide you. You must also comply with the restrictions set forth in the OneUp Terms of Service and the OneUp Privacy Policy, in all uses of the API. If OneUp believes that you have or attempted to violate any term, condition or the spirit of these policies or agreements, your right to access and use the API may be temporarily or permanently revoked.
REST API
The API is implemented as JSON using all four verbs (GET/POST/PUT/DELETE). Each resource, like Customer, Item, or Order, has its own URL and is manipulated in isolation. In other words, we’ve tried to make the API follow the REST principles as much as possible.
For each resource, you can get, create, update, delete an element and also list all the elements. If you are not familiar with the REST API, here is a summary:
| Resource | GET | PUT | POST | DELETE |
|---|---|---|---|---|
| Collection URI, such as https://api.oneup.com/v1/customers |
List all the elements of this collection.
You might need to use the pagination to browse the results. |
- | Create a new element in the collection.
The id of the element is assigned automatically. |
Delete multiple elements. Learn more. |
| Element URI, such as https://api.oneup.com/v1/customers/42 |
Retrieve the element 42. | Update the element with the id 42. | - | Delete the element with the id 42. |
Note: All the resources follow this schema unless specified otherwise in the resource documentation page itself (i.e. read-only resources).
How we parse the JSON
This is how we parse and interpret the JSON input you send to us. Please read these rules carefully:Missing fields
- Edition Mode: the missing field is ignored, and no changes will be performed on it. If you want to edit a single field, just send this single one.
Non existant fields
- If your JSON contains fields that are not part of the resource, those will be silently ignored.
Duplicated fields
- If a field appears more than once in the JSON, the value of the last one will prevail.
Wrong values
- Bad type: If any value of a wrong type stands into your JSON, the parsing of the JSON will turn wrong and an error message will be returned.
- Wrong value: Some fields only accept certain values. If the value of such a field is wrong in your JSON, an error message will be returned.
- Non editable: While editing a resource, if any field that is not editable stands within your JSON, and tries to perform an actual modification, an error message will be returned.
Lists
A field consists in a list of data of another kind, with their own JSON format (like customer's contact list). While editing such a list, the list you send will become the whole new list. Which means the following:- Data that don't appear anymore in the new list will be deleted.
- Data that are in both the old and the new list will be updated.
- Data that are only in the new list will be created.
- Sending an empty list will delete all the elements.
- Like other fields, omitting the field wont perform any changes on the list.
If the current contact list is:
contacts: [ { "id": 48, "first_name": "Ed", "last_name": "Smith", "email": "ed.smith@oneup.com" }, { "id": 49, "first_name": "John", "last_name": "Doe", "email": "john.doe@oneup.com" } ] contacts: [ { "id": 49, "email": "new.email@oneup.com" }, { "first_name": "James", "last_name": "Brown", "email": "james.brown@oneup.com" } ] Security and Authentication
This API is an SSL-only API, regardless of how you may have your account configured. You must be a verified user to make API requests. You can authorize against the API using an oauth2 access token or basic authentication with the API email and an API key.
API key
Retrieving the API key
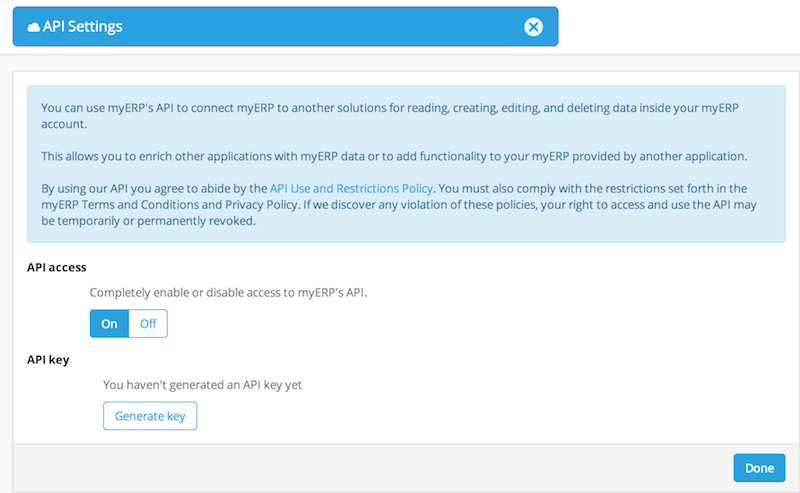
To retrieve your API email and your API key, you have to log in into your account, then go to Settings > API settings and click on the Generate Key button.
Authenticating using curl
curl https://api.oneup.com/v1.. -u "email:api-key"curl https://api.oneup.com/v1/customers -u "api_12_e3ab@api.oneup.com:34a352e421d03a4qXqc91f9b48ed7eb02e5"OAuth2 (Staging)
Introduction
OneUp API supports OAuth 2.0 protocol for authentication and authorization.
To use OAuth authorization, you first have to obtain the client credentials from OneUp.
After we provided you the credentials, your client application will be able to request an authorization code from the OneUp Authorization Server.
This code has to be exchanged for an access token. Finally sends use access token to call OneUp API.
Client Credentials
To obtain a client credentials, please ask our support team.
When requesting the credentials, you must provide us the following information:
- Name of your company and application
- Logo of your application
- URL of the website of your application
- A callback URL
redirect_uri
The callback URL is the endpoint to which the OneUp Authorization Server will send the authorization code, after the user authenticates and allow your application to consume his data.
The following information will be provided to you after your client credential is created:
| Parameter | Description |
|---|---|
| client_id | The unique id of your client |
| client_secret | The secret key which your application will use to exchange authorization codes for access tokens |
Obtain an Authorization Code
Endpoint: https://oauth-staging.oneup.com/oauth2/authThe OAuth2 Flow is initiated by redirecting to the endpoint shown above. All the following query parameters are required:
| Parameter | Valid Values | Description |
|---|---|---|
| response_type | code * | Indicates that the client expects to receive an authentication code that will later be exchanged by an access token |
| client_id | your_client_id | The unique id that was provided to you after your client credential was created |
| redirect_uri | your_redirect_uri | The callback url that was provided to us when you requested your client credential |
| scope | offline_access * | The only scope available. It indicates that you will have read access to user's data and you will receive a refresh token when exchanging the authentication code |
| state | any_string | This value must be present in the authorization response and must be the same as the one you sent in the request. For more information on how to take advantage of this parameter, check this article |
* only one possible valid value
curl -D- --request GET 'https://oauth-staging.oneup.com/oauth2/auth'\
'?response_type=code'\
'&client_id=xxxxxxxxxx'\
'&redirect_uri=xxxxxxxxxx'\
'&scope=offline_access'\
'&state=xxxxxxxxxx'
The OneUp Authorization Server will redirect to OneUp login page:
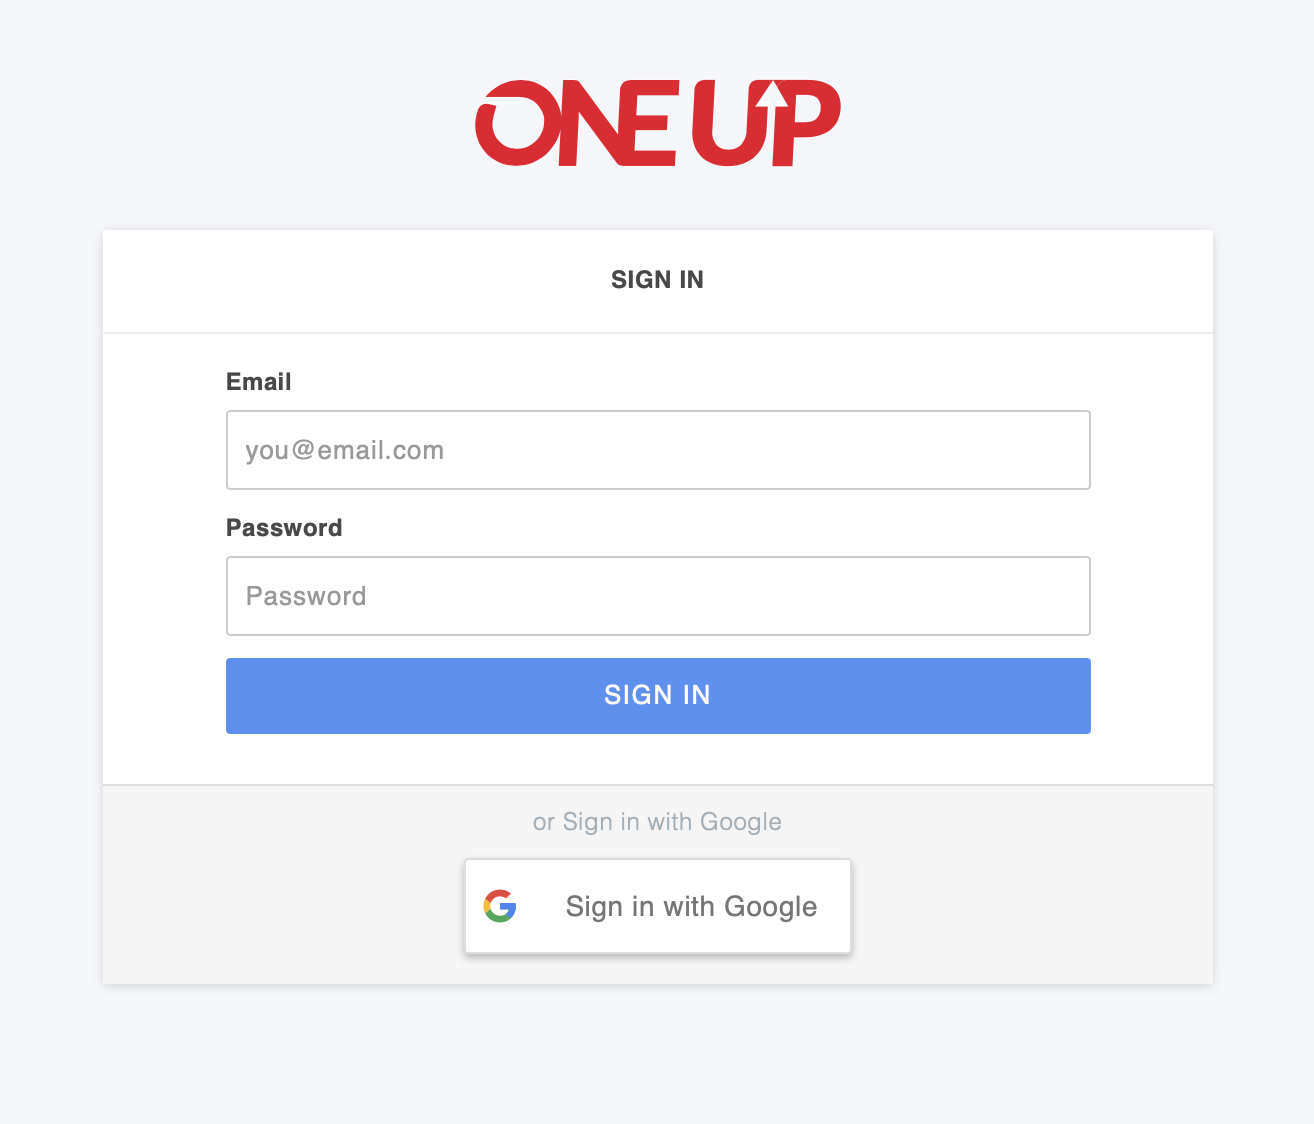
Once the user entered his credentials and click the "Sign In" button, he will be redirected to the consent page to allow your application to access his information:
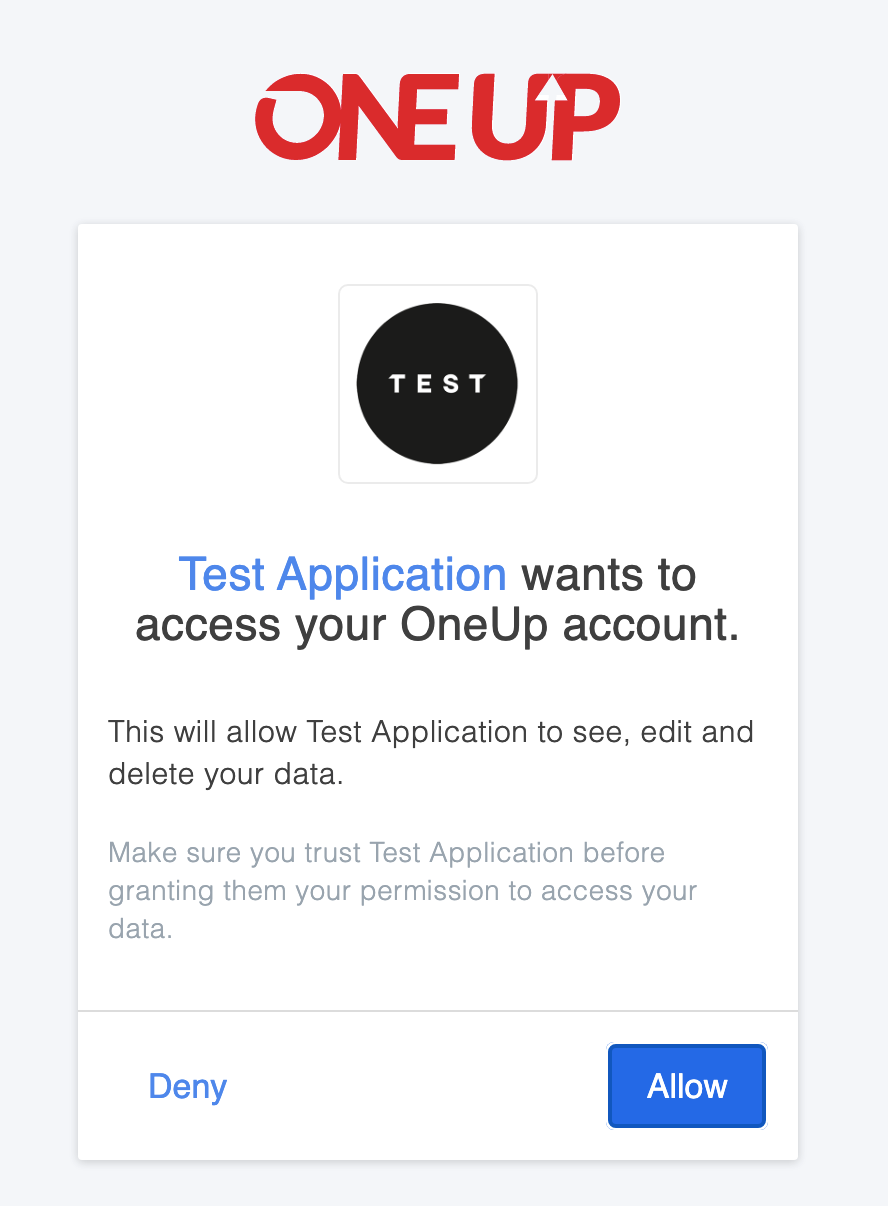
If the user click "Allow", the authorization flow is finished and the Authorization Server sends the authorization code through your redirect_uri:
GET /your_redirect_uri?code=xxxxxxxxxx HTTP/1.1
Host: your.host
In case the user press the "Deny button. The Authorization server will redirect with the following parameters to your redirect_uri:
GET /your_redirect_uri?error=access_denied&error_description=the+resource+owner+denied+the+request&state=xxxxxxxxxx HTTP/1.1
Host: your.host
Exchange the Authorization Code
Endpoint: https://oauth-staging.oneup.com/oauth2/tokenAfter receiving the Authorization code, your application has to exchange it for an access token.
To do that, your application has to make an HTTP POST call to the endpoint shown above.
The following parameters must be provided with the call:
| Parameter | Valid Values | Description |
|---|---|---|
| grant_type | authorization_code * | Indicates that the client wants to exchange an authorization code for an access token |
| client_id | your_client_id | The unique id that was provided to you after your client credential was created |
| client_secret | your_client_secret | The client secret that was provided to you after your client credential was created |
| code | authorization_code | The authorization code your application received in the last step |
| redirect_uri | your_redirect_uri | The callback url that was provided to us when you requested your client credential |
* only one possible valid value
curl -D- --request POST 'https://oauth-staging.oneup.com/oauth2/token/' \
--header 'Content-Type: application/x-www-form-urlencoded' \
--data-urlencode 'grant_type=authorization_code' \
--data-urlencode 'client_id=xxxxxxxxxx' \
--data-urlencode 'client_secret=xxxxxxxxxx' \
--data-urlencode 'code=xxxxxxxxxx' \
--data-urlencode 'redirect_uri=xxxxxxxxxx'
The OneUp Authorization Server will respond with a JSON containing the access token and a refresh token.
{
    "access_token":"xxxxxxxxxx",
    "expires_in":3600,
    "refresh_token":"xxxxxxxxxx",
    "scope":"offline_access",
    "token_type":"bearer"
}
Here is a simple description of the fields returned in the JSON:
| Field | Description |
|---|---|
| access_token | The token that your application will use to authenticate with OneUp API |
| expires_in | The number of seconds that the access token will be valid After that, the access token will expire |
| refresh_token | A refresh token that your application can exchange for a new access token This flow will be covered in the next section of this document |
| scope | The scope granted to your application. Right now the only scope supported is offline_access |
| token_type | The token type which will always be bearer |
Refresh the Access Token
The refresh_token received when exchanging the authorization code for an access token can be used to obtain a new access token.
This is particularly useful in the case of the original access token has expired and the application does not want to start a new authorization flow.
If you make a request to OneUp API and the token has expired already, you’ll get back a response indicating as such. You can check for this specific error message, and then refresh the token and try the request again:
{
    "error": {
        "status": 401,
        "code": "1",
        "message": "Unauthorized: the provided token is not active"
    }
}
To exchange the refresh_token for a new access token, your application calls the same endpoint used to obtain the access token, sending the following new parameters:
| Parameter | Valid Values | Description |
|---|---|---|
| grant_type | refresh_token * | Indicates that the client wants to exchange a refresh token for a new access token |
| client_id | your_client_id | The unique id that was provided to you after your client credential was created |
| client_secret | your_client_secret | The client secret that was provided to you after your client credential was created |
| refresh_token | refresh_token | The refresh token your application received in the last step |
* only one possible valid value
curl -D- --request POST 'https://oauth-staging.oneup.com/oauth2/token/' \
--header 'Content-Type: application/x-www-form-urlencoded' \
--data-urlencode 'grant_type=refresh_token' \
--data-urlencode 'client_id=xxxxxxxxxx' \
--data-urlencode 'client_secret=xxxxxxxxxx' \
--data-urlencode 'refresh_token=xxxxxxxxxx'
The OneUp Authorization Server will respond with a JSON containing the new access token and a new refresh token.
{
    "access_token":"xxxxxxxxxx",
    "expires_in":3600,
    "refresh_token":"xxxxxxxxxx",
    "scope":"offline_access",
    "token_type":"bearer"
}
The new access_token can be used for resuming the calls to the OneUp API.
The new refresh_token can be used later to refresh the access token.
PKCE Flow
The OneUp Authorization Server supports authorization code flow with Proof Key for Code Exchange (PKCE)
In you want to add additional security in the authorization flow, you can implement PKCE.
The PKCE-enhanced Authorization Code Flow builds upon the standard Authorization Code Flow, so the steps are the same as described above.
The difference is that your application have to send more parameters when starting the authorization flow and when exchanging the authorization token.
The following new parameters should be send when starting the flow:
| Parameter | Description |
|---|---|
| code_challenge | The code challenge generated by your application |
| code_challenge_method | The method used to generate the code challenge The plain method does not change the input, so the value of code_verifier and the resultant value of code_challenge are equalThe S256 method computes the SHA-256 hash of the input and then encodes the hash value using Base64-URLWhen code_challenge_method parameter is omitted, the authorization server assumes plain as the default value
|
curl -D- --request GET 'https://oauth-staging.oneup.com/oauth2/auth'\
'?response_type=code'\
'&code_challenge=xxxxxxxxxx'\
'&code_challenge_method=S256'\
'&client_id=xxxxxxxxxx'\
'&redirect_uri=xxxxxxxxxx'\
'&scope=offline_access'\
'&state=xxxxxxxxxx'
The authorization server will save the code_challenge and code_challenge_method to later verify a token request from the client application.
The response from the authorization endpoint remains the same. However the following parameter must be send when exchanging the authentication code:
| Parameter | Description |
|---|---|
| code_verifier | The code verifier used to generate the code_challenge |
curl -D- --request POST 'https://oauth-staging.oneup.com/oauth2/token/' \
--header 'Content-Type: application/x-www-form-urlencoded' \
--data-urlencode 'grant_type=authorization_code' \
--data-urlencode 'client_id=xxxxxxxxxx' \
--data-urlencode 'client_secret=xxxxxxxxxx' \
--data-urlencode 'code=xxxxxxxxxx' \
--data-urlencode 'code_verifier=xxxxxxxxxx' \
--data-urlencode 'redirect_uri=xxxxxxxxxx'
The authorization server will verify if the two code challenges' are equal, if the codes are verified, the authorization server issues an access token as usual.
Handling Errors
Note: When your application starts the flow, omitting or sending an invalid redirect_uri or client_id,
an error page will be displayed to the user given that the Authorization Server cannot trust the redirect_uri.
When an error occurs during the OAuth2, the user will be redirected to the redirect_uri with the following query parameters:
| Parameter | Description |
|---|---|
| error | A unique string id indicating which error occurred Your application can use this id to map possible errors and handle it See the table below for possible values for this field |
| error_description | A description of the error that occurred |
| error_hint | A possible hint to fix the error |
| state | The state parameter value which was sent during the start of the flow |
The same parameters listed above will be returned for requests made without user interaction (i.e: code exchange, refresh token) in a JSON format.
| ID | Http Status | Description |
|---|
Using the Access Token
Your application can use the access token to authenticate requests against OneUp API.
For that, simply add the access token in the header Authorization for each request to the API.
The application uses the Bearer authentication scheme to transmit the access token, as shown in the examples below:
GET /v1/me HTTP/1.1
Host: api.oneup.com
Authorization: Bearer xxxxxxxxxx
curl -D- --request GET 'https://api.oneup.com/v1/me' \
--header 'Authorization: Bearer xxxxxxxxxx'Support Downloads for Development
The following downloads can be used by developers to validate the client against OneUp staging environment
You can download the files by clicking in the above image.
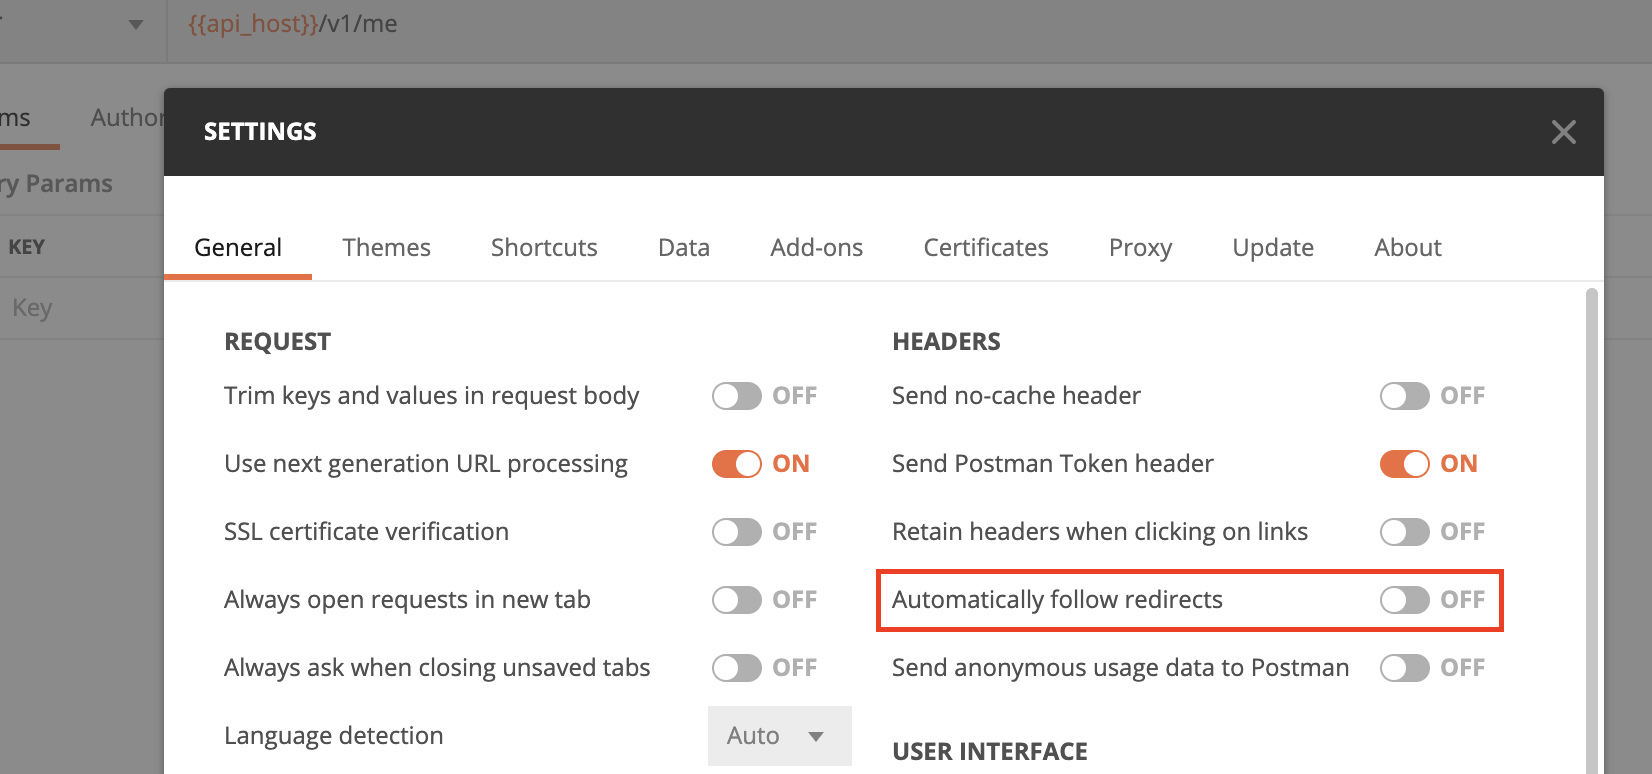
You must disable automatically follow redirects option in Postman to be able to run all the requests in the collection.
This option is under Postman > Preferences > General > Headers tab, as shown in the image below:
X-API-Authorization
To use endpoints secured by the X-API-Authorization header, redeem your company's token from OneUp's staff and put it as the header value.
Pagination
Requests that return multiple elements will be paginated to 100 items by default.
Most APIs that list resources are paginated. Pagination is consistent across all APIs that require it. You can use the offset and limit parameters to page through query results.
| Name | Type | Required | Description |
|---|---|---|---|
| offset | integer | no | The offset of the first record returned. Default is 0. |
| limit | integer | no | The number of records returned. Default (and max limit) is 100. |
Sorting
The API allows sorting ASC or DESC by passing the parameter sort with the option name your want to sort on, prefixed by + for ASC and - for DESC. For instance, use &sort=-id to sort by id field in reverse order.
Keep in mind that only certain endpoints and certain fields support this feature. Check the "Available Sorting Options" section of each EndPoint for available option names and fields.
Filter
Comparators can be used to combine allowed parameters and create advanced filters. Check the "Available Filter Fields" section of each EndPoint for available filter names and fields.
Thanks to comparison and conjunction operators filter, you're allowed to retrieve and shape data the way you need. For instance, to retrieve realized accounting of a certain journal within 2020 first quarter, you can pass the following parameters to the "transactions" end point :
?date=gte:2020-01-01%20AND%20lte:2020-03-31&journal_id=4&status=realized Comparison operators
| Comparison parameter | Description |
|---|---|
| lt: | < (less than) |
| lte: | <= (less than or equal) |
| gt: | > (greater than) |
| gte: | >= (greater than or equal) |
| eq: | = (equal to) |
| not: | != (not equal to) |
Rate Limiting and limits
General
This API is rate limited; we only allow a certain number of requests per minute. We reserve the right to adjust the rate limit for given endpoints in order to provide a high quality of service for all clients. Rate limiting in version 1.0 of the API is primarily considered on a per-user basis — or more accurately described, per API key in your control.
15 Minute Windows
Rate limits in version 1.0 of the API are divided into 15 minute intervals. Additionally, all 1.0 endpoints require authentication. API v1.0's rate limiting model allows for a wider ranger of requests through per-method request limits. There is one initial bucket available: 3600 calls every 15 minutes.
Each response from the API contains informational headers about the current usage of your limit:
- X-Ratelimit-Limit: Your rate limit
- X-Ratelimit-Remaining: How many calls are remaining before reaching the limit.
- X-Ratelimit-Used: How many calls have already been made.
HTTP Response Code
If the rate limit is exceeded, OneUp will respond with a HTTP 429 Too Many Requests response code and a body that details the reason for the rate limiter kicking in. You should anticipate this in your API client for the smoothest possible ride.
Complementary to the HTTP Error 429, the header Retry-After will be present in the response. The header value indicates the date and time when the limit will be reset.
Tips to avoid being Rate Limited
The tips below are there to help you code defensively and reduce the possibility of being rate limited. Some application features that you may want to provide are simply impossible in light of rate limiting, especially around the freshness of results.
Caching
Store API responses in your application or on your site if you expect a lot of use. For example, don't try to call the OneUp API on every page load of your website landing page. Instead, call the API infrequently and load the response into a local cache. When users hit your website load the cached version of the results.
Bulk Deletion
You can delete up to 50 elements of any resources by using the bulk deletion. Learn more about the bulk deletion.
Error Codes and Responses
In order to provide more informative error responses, our API attempts to return appropriate HTTP status codes for every request and return errors via a JSON error object containing code and message attributes.
| OneUp Code | HTTP Status Code | Message |
|---|---|---|
| 0 | 500 | Oops something went wrong. Please contact us so the OneUp team can investigate. |
| 1 | 401 | Unauthorized. |
| 2 | 404 | The resource was not found. |
| 3 | 422 | The request does not respect the specification. Please see the documentation and double-check each field. |
| 30 | 422 | Business logic violation. The request cannot be fulfilled. |
| 3001 | 422 | Date is not included in the validity interval. |
| 3002 | 422 | Your entries are not balanced. |
| 3003 | 422 | The accounting entry is closed and cannot be edited nor deleted. |
| 3004 | 422 | The accounting entry is locked and cannot be edited nor deleted. |
| 3005 | 422 | The accounting entry is reconciled and cannot be edited nor deleted. |
| 3006 | 422 | Bank Entries with zero amount are not recorded. |
| 3007 | 422 | Payment balance on Closing is negative. |
| 3008 | 422 | Not enough quantity in inventory. |
| 3009 | 422 | This document has no installments. |
| 3010 | 422 | This document has been sent and cannot be edited nor deleted. |
| 3011 | 422 | Due date should be after the document date. |
| 3012 | 422 | Payment date should be after the document date. |
| 3013 | 422 | A mandatory field is missing. |
| 3014 | 422 | A field that should be left empty contains an actual value. |
| 3015 | 422 | Family accounts are not allowed. |
| 3016 | 422 | Mismatched categories |
| 3017 | 422 | The tax entry is closed and cannot be edited nor deleted. |
| 3018 | 422 | Bank transfer requires two different bank accounts. |
| 3019 | 422 | Amount should be strictly positive. |
| 3020 | 422 | The document is already converted. |
| 3021 | 422 | The document cannot be converted to the wanted type. |
| 3022 | 422 | A quote with lost status cannot be converted. |
| 3023 | 422 | The inventory quantity is too low. |
| 3024 | 422 | The document has to be finalized. |
| 3025 | 422 | The order has been partially or fully delivered. |
| 3026 | 422 | The order has been prepared or is already in preparation. |
| 3027 | 422 | The order has already been received. |
| 4 | 429 | Rate limited. |
| 5 | 400 | The request was not parsed. Please double-check the content of the request. |
Bulk Deletion
If you make a lot of API requests in a short amount of time, you may bump into the OneUp rate limit for requests. When you reach the limit, OneUp stops processing any more requests until a certain amount of time has passed.
We provide you a bulk deletion method for each resource. You can delete up to 50 elements at the time by passing a comma-separated list of ids in the query string. The ids parameter accepts only integers separated by commas. If this parameter is missing or contains any wrong characters, you will get a 400.
The API returns a list of errors and a list of successes. The bulk deletion API does not stop when an element cannot be deleted, this element is added to the errors list with the explanation. The successes list contains all the elements deleted.
Example
CURL -X DELETE https://api.oneup.com/v1/customers?ids=12,42,1337 -u "email:api-key" Response
 {
    "success_count": 1,
    "error_count": 2,
    "successes": [{
        "id": 42,
        "type": 1,
        "status": 1,
        ...
        "phone_number": "",
        "email": "",
        "comment": "",
        "company_name": "ACME",
        ...
    }],
    "errors": [{
        "id": 12,
        "error": {
            "status": 422,
            "code": "3",
            "message": "This object cannot be deleted.",
            "reason": "The item cannot be deleted because it is referenced by: Incoming Payment"
        }
    }, {
        "id": 1337,
        "error": {
            "status": 404,
            "code": "2",
            "message": "The resource was not found."
        }
    }]
}
Change Policy
OneUp may modify the attributes and resources available to the API and our policies related to access and use of the API from time to time without advance notice. OneUp will use commercially reasonable efforts to notify you of any modifications to the API or policies through notifications or posts on the Developer Website. OneUp also tracks deprecation of attributes of the API on its Changes Roadmap.
Modification of the API may have an adverse effect on OneUp Applications, including but not limited to changing the manner in which OneUp Applications communicate with the API and display or transmit Your Data. OneUp will not be liable to you or any third party for such modifications or any adverse effects resulting from such modifications.
Support
If you are having trouble, check this section out to find the recommended plan of action.